 Sustafix del cartílago, en el origen de la artrosis primaria. Los diferentes huesos que componen nuestro esqueleto son móviles entre sí gracias a las articulaciones. Una articulación reúne dos extremos óseos que están cubiertos cada uno con un material, el cartílago, que permite un deslizamiento perfecto entre las dos superficies. Este cartílago es una sustancia más flexible que el hueso, muy lisa y que tiene la particularidad de no reconstituirse.
Sustafix lo tanto las dos superficies cartilaginosas que están en fricción sufren un desgaste progresivo comentarios de usuarios actuales 2022 con el tiempo, lo que se denomina artrosis primaria, perfectamente normal y que permite un buen funcionamiento articular durante toda la vida. www.Sustafix.es
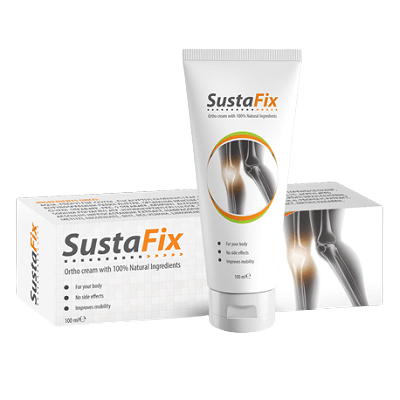
Sustafix crema, ingredientes, cómo aplicar, como funciona, efectos secundarios
 Sustafix ingredientes de riesgo de dolor muscular y articular. En muchos casos, se produce la llamada osteoartritis «secundaria», que resulta de un desgaste más rápido del cartílago en ciertas áreas. Este desgaste anormal es el resultado de tensiones anormalmente altas o mal distribuidas en la superficie de la articulación y, por lo tanto, el cartílago sufrirá mayores presiones.
Sustafix ingredientes origen de estas restricciones anormales puede ser múltiple para la osteoartritis secundaria. Mantén un peso saludable. El peso es un factor importante, sobre todo en las articulaciones de las extremidades inferiores, las que nos llevan, porque cuanto más importante es este, más importante es la presión que se ejerce sobre las articulaciones y, por lo tanto, más rápido será el desgaste del cartílago.
Sustafix ingredientes trauma sufrido también causa grandes tensiones en el cartílago, lo que inducirá un desgaste anormal del mismo. Estas lesiones se pueden aislar de diversos accidentes,caídas, etc. o repetidas, como durante actividades deportivas regulares e intensivas. Sustafix cómo aplicar ya que las articulaciones ya no se utilizan en su máxima amplitud y solo se utiliza una pequeña parte de la superficie articular .
Sustafix cómo aplicar su rápido desgaste, así como una retracción de todos los elementos periféricos de la articulación, haciéndola menos móvil. Sustafix como funciona otras causas pueden explicar el daño del cartílago, como patologías del sistema muscular, neurológico, circulatorio, patologías genéticas y muchas otras. ¡Bien podrían quedarse en la fila. Sustafix como funciona arquitectura general también es muy importante, ya que si en teoría nos proyectamos en un diagrama ideal como aparece en los libros de anatomía.
La realidad a menudo muestra que hay variaciones especialmente en los diferentes ejes óseos, crema lo que también conducirá a una distribución desigual de la tensión en las articulaciones. ¿Deberíamos movernos menos? Economía común. Hablar de ahorro conjunto no significa moverse menos, ¡sino moverse mejor! Vimos que cuanto menos se usaba una ingredientes articulación, más se endurecía y perdía su amplitud. Muévete mejor, en un ambiente térmico.
El calor diferente contribuirá a este mejor uso de la articulación, principalmente debido al composición calor ubicuo del que provocará una relajación de las para qué sirve estructuras periarticulares y permitirá que se libere la articulación dolorosa. Los movimientos realizados en una piscina cómo aplicar con agua termal serán extremadamente como funciona beneficiosos, ya que se realizan con una búsqueda de amplitud máxima y restricciones mínimas debido a la baja gravedad.
La acción directa del masaje combinada con el calor del agua termal tendrá un efecto de relajación efectos secundarios muscular y liberará las restricciones que limitan las articulaciones dolorosas. Los programas para combatir el contraindicaciones exceso de peso, con control dietético, su programa de actividad física y los diversos tendrán un efecto directo y rápido sobre el estrés articular y, por lo tanto, un efecto inmediato en la salud de nuestras articulaciones. www.Sustafix.es
Sustafix opiniones, foro, comentarios
 Sustafix opiniones se debe tener en cuenta que las articulaciones rígidas, dolorosas, retraídas, los músculos sensibles los tendones.
Los ligamentos también se aliviarán con la naturaleza antiinflamatoria de las aguas termales de Vichy, lo que permitirá un mejor uso de sus articulaciones, un progreso visible y sentido un alivio del dolor y una ausencia de efectos secundarios no deseados, con el mantenimiento de este beneficio para la salud durante varios meses.
Sustafix opiniones lo tanto, la prevención del dolor articular requiere un cuidado adecuado y natural, una dieta controlada y adaptada y una actividad física regular para un beneficio rápido y duradero a lo largo del tiempo, la edad, el deporte, las malas posturas, la menopausia. Sustafix foro causas son responsables del malestar articular! Afortunadamente, existen soluciones naturales para combatir estos dolores. ¡Estamos hablando de eso .
Sustafix foro dolor en las articulaciones, necesariamente tengo osteoartritis? El dolor en las articulaciones no significa necesariamente osteoartritis. Sustafix comentarios varias patologías. Artrosis desgaste de cartílagos, especialmente en personas mayores, con sobrepeso, en opiniones deportistas de gran tamaño y en mujeres posmenopáusicas. Artritis inflamación o infección de una foro articulación, aguda o crónica.
Otros dolores: provocados por comentarios traumatismos, lesiones en tendones o ligamentos si siempre recomendamos un seguimiento cuando el dolor persiste, algunos comentarios de usuarios actuales 2022 se pueden aliviar gracias a soluciones naturales ricas en principios activos que actúan sobre las articulaciones. www.Sustafix.es
Sustafix precio
 Sustafix precio cúrcuma y sus poderosas propiedades anti inflamatorias. La cúrcuma contiene curcumina, un ingrediente activo que actúa favorablemente sobre la inflamación y la preservación del cartílago articular. El harpagofito, más conocido como garra del diablo, es reconocido por la OMS por aliviar el dolor articular y promover una mejor movilidad.
Sustafix cuanto cuesta osteoartritis, ¿cómo notar la diferencia? La causa y los dolores son diferentes entre la artritis y la osteoartritis. Artritis las causas son infecciosas, inmunitarias y metabólicas. El dolor de tipo inflamatorio también se siente por la noche y no se alivia descansando la extremidad afectada.
Artrosis las causas son de precio origen anatómico o traumático. El dolor de tipo mecánico se desencadena cuando el cuerpo está en movimiento, pero se reduce con el descanso. Si la artritis requiere cuidados y la artrosis se puede aliviar de forma natural, sobre todo con suplementos dietéticos ricos en principios activos como la cúrcuma, el harpagofito o incluso la grosella negra.
¡Promoverán la comodidad y la cuanto cuesta movilidad de las articulaciones al fortalecer el capital óseo! Para pies y tobillos: opte por zapatos a juego con suelas que absorban los golpes y estabilicen la marcha. Para las manos agarre una pelota suave en las manos, apriétela con fuerza y suéltela ligeramente para fortalecer los músculos. www.Sustafix.es
Sustafix donde comprar, farmacia
 Sustafix donde comprar la rodilla contraiga los músculos que rodean la articulación sin moverla y repita la operación varias veces.
Recomendamos, además de estos pequeños ejercicios, agregar suplementos dietéticos apropiados a su rutina. ¿el objetivo? Encuentre comodidad y serenidad mientras lucha contra los inconvenientes de la menopausia y la osteoartritis. Sustafix donde comprar tiene sobrepeso, desafortunadamente, sus articulaciones se tensan más de lo debido, especialmente las rodillas.
Sustafix farmacia caminar, las rodillas deben soportar una fuerza que represente de 3 a 6 veces el peso del cuerpo. ¿Las soluciones ? Practica actividad física regular, pero no cualquier deporte. Si tiene sobrepeso, es aconsejable dar donde comprar preferencia a los deportes que no implican choque.
Por ejemplo, favorece la natación, que trabaja todo el cuerpo sin peso en las articulaciones. Con dolor farmacia en las articulaciones o no, se recomienda adoptar una dieta sana y equilibrada. No dude en recurrir a un nutricionista para cambiar sus hábitos alimenticios sin desarrollar deficiencias. Me duelen las rodillas cuando corro, ¿es un problema común?
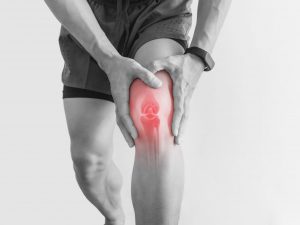
¿Lo sabías ? El dolor localizado en la rodilla se llama gonalgia y puede desencadenarse por varios factores al practicar una actividad, como correr, que ejerce mucha presión en farmacia esta parte del cuerpo. Mala postura al correr en este caso, ¡pídale consejo a un profesional sobre cómo solucionarlo.
Zapatos malos ! Hacer deporte requiere en farmacias un equipo de calidad para que no haya repercusiones en su cuerpo. Traumatismo articular que puede despertar corriendo. En estos casos, ¿se recomienda descansar una solución natural para el dolor articular? Entre las soluciones naturales más conocidas y efectivas , encontramos la cúrcuma, el harpagofito o incluso la grosella negra. www.Sustafix.es
Sustafix mercadona, amazon – España
 Sustafix mercadona omega 3, que se encuentra en pescados grasos pequeños como las sardinas o las anchoas, también juega un papel favorable en el dolor articular. A menudo tengo dolor de garganta por la mañana cuando me levanto, ¿cómo puedo explicarlo? ¿Qué se puede hacer para evitar esto? Lo primero que debe hacer por la mañana si tiene dolor de cuello?
Sustafix amazon 5 minutos por la mañana para despertar los músculos y liberar el dolor que se ha asentado durante la noche. Si el problema es recurrente, puede ser su almohada, que no está adaptada a su posición. Cámbialo si el dolor persiste y es recurrente, busque el consejo de .
Haga ejercicio, prestando atención al tipo de deporte que practica para no causar demasiados traumas en las articulaciones. Recuerde que es importante moverse y tomar aire fresco con la mayor frecuencia posible.
Sustafix fabricante zapatos buenos, cómodos y que absorban los golpes! Evita los zapatos que sean demasiado planos y favorece los que sujeten bien los tobillos. Después de hacer un esfuerzo físico, si siente dolor, debe actuar de inmediato. Sustafix España las articulaciones con hielo durante 10 a 15 minutos. Si tiene un dolor de rodilla o tobillo muy intenso, descanse y haga el menor esfuerzo posible. Si después de dos o tres días el dolor persiste, no dude en consultar .
Para prevenir estos dolores a mercadona diario, opte por suplementos dietéticos diseñados para la comodidad de las articulaciones. Dolor, rigidez e hinchazón de las articulaciones, tendinitis, dolor de espalda, despertares nocturnos en mercadona patologías que afectan las articulaciones, la columna vertebral y los huesos provocan sufrimiento y dificultad para moverse, lo que afecta la calidad de vida.
Para reducir este dolor y promover en mercadona la movilidad, las soluciones prescritas se basan principalmente en productos farmacéuticos junto con cuidados, como la rehabilitación física con un fisioterapeuta. la intervención amazon también puede ser necesaria en caso de deterioro funcional incapacitante significativo resistente a (prótesis de rodilla y cadera, intervención en la columna vertebral, en particular).
Para una mejor reumatología, es ebay esencial un enfoque integral de la patología, en el que la térmica tiene un lugar importante. El cuidado proporcionado, con fines sedantes y de rehabilitación, mejora efectivamente la movilidad y reduce el dolor, lo que resulta en un menor uso. Sorprendentemente, ebay estos efectos beneficiosos se observan con mayor frecuencia durante la curación o su curso inmediato y, sobre todo, en más de tres cuartas partes persisten durante más de 9 meses después.
La curación es a menudo el fabricante desencadenante de estos . Al recuperar la confianza en sí mismos, reanudan actividades que han sido descuidadas durante varios años y luego adoptan un estilo de vida saludable, lo que puede ayudar a retrasar la patología. Esto, creado en Eugenie-les-Bains, ha sido una necesidad para el calor durante varios años: la densidad particular del caolín (arcilla blanca) mezclado con agua termal permite la ingravidez que promueve la relajación profunda, enfatizada por el masaje inducido por el flujo de luz, así como la relajación de las articulaciones.
Las propiedades fisicoquímicas de España los baños y el agua termal contribuyen a la reducción del dolor y los efectos beneficiosos sobre el cartílago articular. La pasteurización continua garantiza la calidad microbiológica. Bajo la guía de un fisioterapeuta, el realiza movimientos gimnásticos de rehabilitación en una piscina con agua termal. www.Sustafix.es